I hope I’m not the only person that decides on a project and thinks, “oh ya, that will probably take like three, four hours tops” and then two full days later you’re sitting on a pile of cursed rocks slumped over in total exhaustion and reality that you’re not done… at all…
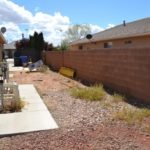
Actually I hope I am the only one that under estimates how much time a project will take, but I’m kinda thinking I am not. I will save you the long saga on the side yard over the weekend, and report happily, I really am almost done (okay, maybe refer to paragraph one in that statement.) Well, at least all the materials to finish are at the house now! Here is the current state of said yard:
Not bad right? A reader Emily (shout out to you girl) asked if I would post how to make a drip line system for trees. I have written a tutorial for a garden drip line, but a tree is a bit different… the good news is, if you have a convenient water source it really is easy!
Materials:
- Water source
- Connecting parts to your water source
- Drip line tubing, I use the 1/2 inch size
- End cap
- garden shepherd hooks
- Drip emitters (tiny nozzels)
I actually liked this article on irrigation drip lines by How Stuff Works. There are many different ways of installing a drip system and different kits you can buy, but this is the cheapest way that works best for me:
1. Connect to your water source. Find out the size of your water source if you don’t already know it. You can cut a piece off or measure it, I use my sewing measure tape, works great.
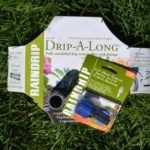
Don’t be afraid to ask the person at the sprinkler store how to connect your size and type of water source to a garden drip line tubing. Mine required a simple connector. The connect by simple pushing the pipe into the connection:
2. The great thing about drip line tubing is it is flexible and can zig zag through plants, but also it doesn’t need to be buried like a pipe would be. Hallelujah to that! Run your drip line near what you need watered, in my case a tree.
3. Flush out or clear the drip line to remove dirt and rocks (picture from the garden drip-line tutorial). You want to make sure the pipe is clear so rocks and dirt don’t get jammed into the emitters and preventing water from getting through.
4. Cap off the end. I use a figure 8 piece, fold down the tubing and put on the figure 8 (make sure you get the right size for your tube). I used a zip tie once and without warning it snapped after so much sun and flooded the yard… splurge the .99 cents and make sure the water is tied off.
5. Add emitters by poke through the line. This is where the water will come out. Place it near the roots of your trees:
6. Use the Shepard hooks to hold your line in place and then bury your line under your ground cover.
Let me know if you have questions! Happy Creating!

Leave a Reply