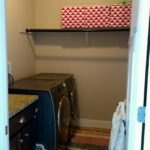
The laundry room design is coming along. Remember what it looked like before?

Laundry Room Before
I decided to go with Option A! It added plenty of storage, the layout worked without having to redo plumbing or the counter top, and it was the least expensive.

Winner — Option A
I painted the lower cabinet, took the shelf down, added spackle and repainted (still some touch ups to do).

Shelf down, spackle on ready to sand and paint
Taking down a shelf is easy. Usually they are attached with long brad nails. Getting them down is as easy as prying and pulling. No sledge hammers for this step, I didn’t want damage to anything else and I plan to reuse this shelf in my office closet (more later).
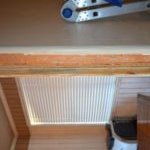
Adding the upper shelves was… hard. I gotta be honest. I bought these ready to assemble pre-fab ones on a great deal from Home Depot. While the assembly was a piece-of-cake getting them on the wall was not like eating cake. I didn’t have all the right tools and my studs were so far apart there was a lot of heaving lifting. I used a level shim to rest the shelves on while I drilled. You can still barely see the wood shim under under the shelves. It was a two person job for sure.

Laundry room renovation upper cabinets
Next step, add the two shelves and then tile. I’m pretty excited about tiling and getting some color into the space.

Check back for updates and more projects!
Happy Creating!


Leave a Reply