
It might sound crazy but the hardest part of designing this thing was trying to enclose the thing. My bff hubby knows that one day we will need to sell this house and he would like it to stay absolutely vanilla until then. I get gasps when I announce a new accent wall, just imagine the exasperation he doled out when I was determined to build a indoor tree house, with a slide, and a swing, and paint, and…. well, perhaps you get those looks with your projects too (he’s a pretty good sport though). Any who, I wanted minimal change to the house, but utmost safety. I also wanted the thing to look like a tree house, not a loft, so that called for a little more creativity. I considered the following that you may want to use, my reasons for not using them may not be applicable to you:
- Railing. A great option. Building a railing is time consuming (think sanding, sanding, sanding) and buying railing is expensive. Plus, it wasn’t the look I was going for.
- Full enclosure, like a box. I love these tree houses, they are super cool. But full enclosure like this mean more holes in your ceiling and structure and I didn’t have any extra light, which means it would be a little spooky up there. Plus, this idea was originally derived from the “Magic Tree House” book series and I wanted the kiddos to read and read… hard to do without light!
- Pirate-y rope railing. This would also be super cool, but rope is a little pricey (like the big bulky, pirate kind) and there was something about a rope fence that screamed strangulation to me.
What I came up with was a use-leftover-wood-and-cut-til-it-looked-like-a-tree approach. I had the materials, it kept with the theme, allowed light in, didn’t drill into the walls, and was safe. Perfect.
The steps are (sorry I don’t have pictures of each step!)
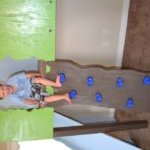
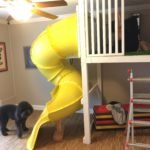
- I used leftover flooring and other wood to piece together the enclosure around the tree house, allowing 16″ opening for the frock climbing trunk and 18″ opening for the slide. I sketched out leafy tree-like pattern and cut with my beloved jigsaw.
- Sand, sand, and sand some more…
- Paint. I scored this paint for free during a Clark & Kensington paint weekend promotion and it is really good paint. Ahhh, the beauty of promotions.
- Attaching to the loft. I use brackets to hold braces the wood to attach with two 3″ wood screws every 14 inches. I used straight and L-brackets to brace the corners together (I use any screws I can find) and viola!
- I added a few extras to the tree enclosure, a periscope and a telescope. The kids love them and this make-shift-gate is strong enough to withstand all the craziness that goes on in there!
This step was so fun and once on the tree house, I started thinking I might pull off the project after all!
Happy Creating!

Leave a Reply