UPDATE 2.19.2014 I recently refinished this oak table again, HERE. I still use this stain on other projects like this frame and this stand, but it did not work for my high-traffic-used-and-abused kitchen table!!!
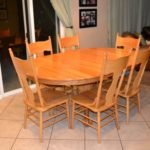
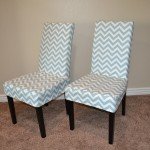
Buy it, use it, wear it out, make it do or do without! My aunt gave me an oak table years ago and although it is not my style, what mother of three boys can resist free solid oak? When we moved into this current house, however, I didn’t even bring it inside. If you are looking at the before picture thinking “holy orange” you’re not alone! Although now I wish I would have refinished the chairs I sold them at a consignment store and bought some parson chairs (you can read about the covers here). And then I started shopping for a new table and I spent hours I tell you trying to find just two things. 1. Solid 2. Affordable. Turns out I struck out on that winner combination. I couldn’t justify spending thousands when I had this table calling my name in my garage (and plus I love painting things it should have been a no brainer).
So, game on. I sanded my heart out until I got to the pedestal and I just couldn’t do it anymore… literally, I was pregnant and I could not bend in the right way to sand it. Plan B. Find a stain that I could apply without actually sanding the whole thing.
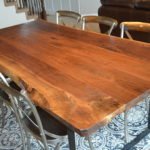
I researched different products and finally found Minwax PolyShades and decided to give it a try. Although the sanding throughout the project should be uniform and mine was not, the result was beautiful. Here are a few pointers & pics:
- Separate the pieces of your project, take it apart.
- Sand the wood in the direction of grain using fine-grain sandpaper (#220) until smooth. Not all of the stain needs to be gone, that’s the beauty of it!
- Remove all sanding dust.
- Wood has to be dry, clean, no dirt, grease or glue. To get to this point you can use a tack cloth (you can buy these anywhere) or I love to use a blue surgical towel (pictured above) that I somehow scored after my son’s tonsillectomy. They are dust free, you can wash it a zillion times, and it’s indistructable. Oh ya, and I didn’t actually buy it (totally not applying the medical bills to that phrase of course) so I love it all the more. It’s like my cleaning secret weapon. If you have any connections to a surgeon or a hospital I highly recommend finagling one.
- Apply in thin coats, going with the grain. I applied it with a foam brush, though I think a paint brush would be better.
- Make sure you let it dry between coats
- PolyShades comes with the polyurethane IN the product so you don’t have to coat it when you’re done. I love that part, but if you don’t like shiny wood, you might not like this product.
I should mention, this product didn’t allow the wood to really drink in the stain… it more just sits on top of it. But for my aversion to sanding pedestals while ginormously pregnant, I was happy with it. Ironically, the pedestal is now my favorite part. I was afraid of staining all the curves, but after a little practice with the top of the table the pedestal was easy and it’s soooooooooo pretty.
Do you have some furniture that is so not your style? Like a dang-this-is-such-good-quality-I-really-wish-I-liked-it furniture? Try giving it a new color and see if it’s livable! Happy Creating!


Looks amazing! Love it!