Jun
2013
Train Stand
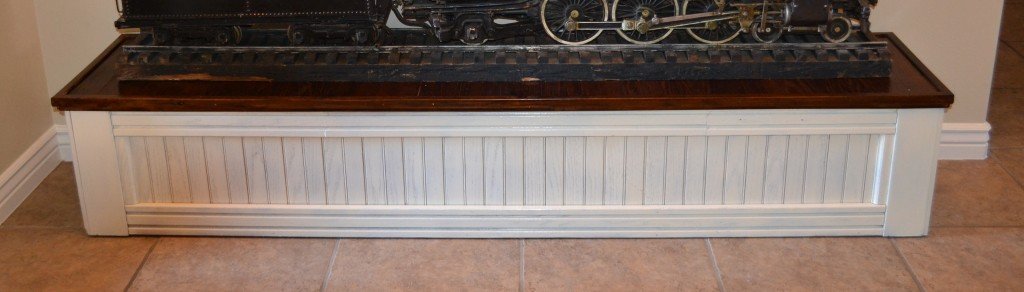
Thank you for all the comments and kudos on the last post about pretty much the coolest thing I own (only I don’t own it, I just get to have it for a while!) My cousin Paul, my closest to age cousin, loved and cared for the train for years. He built the base to support the massive weight and size. Here’s what he had to say about it:
“I built the stand out of oak that I salvaged from the first remodel I helped my Dad do on the dining room of his first Wendy’s. I used to go to the store in the mornings before I’d go to school (I was like 12 years old) and help get things ready for the day. One of my jobs was to clean that wood with Old English a few times a week. When it was time to remodel the store I grabbed that oak and stored it for years waiting to use it on the right project. When I opened up the box that had the train in it I knew I had found the project to use the oak on.”
Clearly Paul (owner of Playco Park Builders Inc.) and I share some of the same blood… I love that he salvaged oak from a Wendy’s restaurant. And I love that he knew one day it could be spectacular! I am so grateful to him for building it! When the train arrived at my house the base just needed a little touching up. Apparently I have an aversion to sanding when the going gets rough, so I stained the top and spray painted the bottom (I know, I know who the heck spray paints oak right?) Well I had planned to glaze the base but I loved the look so I stopped while I was ahead.
The whole idea to building a base for a statue, art, or train in this case, is to make is look fantastic without taking away from the art itself. Simple and clean is usually best. With the unique look of this train I tried to make the base a little rustic.
Materials used:
Rust-oleum Painters Touch is probably my favorite spraypaint, every color seems to be awesome, I used plain white for this project. I love Miniwax PolyShades, I have used it on three different projects (kitchen table, frame, and this base) and it’s a gift that keeps on giving! I wish I had a before picture, but alas, I do not! Just picture orange-y oak and you get the idea. The process was simple, stain the top, add trim, and spray paint the base. Here is the after:

Happy Creating!