A reader (and my sister) Zub sent me this comment “Look what I’m making using your tutorial!” and this picture:
She is making it from my Parson Chair Tutorial. I couldn’t be more proud! Good job Zub!
If anyone out there has any projects they have made because of (or even in part of) this blog I would loooooooooooooove to see it! Please send it over!
Happy Creating!
This is a tale of two chairs. My winter-survival-yellow chair had a sister. After the yellow chair redo I had a few people ask, does it really take an hour!? So, this time I timed it. I followed the same steps as the yellow chair and the jury is in. It took 48 minutes, 2 seconds. A can of spray paint, some left over fabric from the parson chair slipcovers, and less than an hour and I have another side chair. If you’re looking for the full tutorial read all about it here, check out the pictures below for the one hour chair recover challenge:
Timer On:
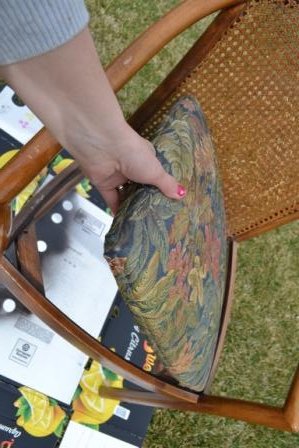

Apply the second coat of paint and done!
Which chair do you like better?

Now, go, get busy and do something in less than an hour!
Happy Creating!
My 91-year old grandmother just moved into assisted living. I am having mixed emotions about it. Part of the transition, if any of you have done this before, is deciding what to do with all of her things. During this process I was offered her old leather couch. I’m thinking it’s at least 20 years old. Have you ever come across a piece of furniture like this:
- The bones are good… it is sturdy and still has good lines and design
- The piece is overall in good condition
- BUT it is worn on the cushions or arms, the well-used areas
If you have something like this, this repair is right up your alley. Here is what the couch cushions looked like when I picked it up from grams:
Yikes right? Well friends, if your furniture looks like this there IS a light at the end of the tunnel! I received quotes of $300-$450 to restore the cushions, so I took to google to solve my leather woes. After a fair amount of research I bought Leather Nu on Amazon for about $30.
I cleaned the furniture really well (this step is always so encouraging to keep going) and then I followed the directions to mix the paint to the color of the cushions:
I used a plastic cup and a popsicle stick. After about 1/2 hour of mixing and trials in inconspicuous areas of leather I finally got the color close enough to give it a go. I am such a Picasso. The result was awesome:
After drying the paint didn’t rub off on any clothes and I think the couch is worth saving afterall! For $30 there is new life in gram’s old couch. I am going to touch up the leather in my house now… try it on one of yours!
Happy Creating!

My happy yellow table is finished! I love it! My husband rarely thinks projects are a great idea, so when he continually said, “so…. what are you going to do about this table” I knew it was serious. In the spirit of full disclosure I must say that yellow is not my favorite color, but every time I thought of fixing our table it is the only color that came to mind. I tried to shake it, but finally gave in. When a friend was over I asked what she thought of painting a table yellow (because I seek validation ya’know) and she was instantly on board. Whesh, one cool friend thinks it’s a good idea… Her daughter’s room is painted a beautiful “SW 6695 Midday” yellow. Since I get super distracted by paint color names (am I the only one who does that!?) I matched that color but went one paint strip more mustardy and found the perfect yellow Sherwin Williams “Solaria”!
I followed a tutorial on Centsational Girl found here… and will show you some of my pictures, instructions, and what-I-wish-I-would-have-done’s. Let’s start with the steps:
- Gather materials
- Prep table for painting. I had to sand because my table looked like this.
- Prime the table, two coats!
- Paint, two coats!
- Apply protective coat (one or two coats)
The pattern really is basically Clean.Paint.Dry.Sand.Repeat. over and over. Child’s play right? And now, the nitty gritty.
Materials:
- Paint brush (Purdy is my favorite!)
- Primer, I like the Zinnser brush on (cheaper)
- Paint: I used a Clark & Kensington paint
- Rags
- Drop cloth
- Protective layer: I used Helsman semi-gloss
Step 1: Sand down and chipping paint, smooth out edges, fill in cracks and get the table smooth… unless of course you don’t want smooth!
Step 2: Clean your table with a tack cloth (also called a cheese cloth) or a lint free rag before adding the primer. Yep, that’s a blue surgical towel that I always use… that’s my benefit from my bff getting back surgery! You need two (sorry, it really is two) coats of primer. Allow at least 8-10 hours in between coats. I always let my project dry overnight before re-coating.
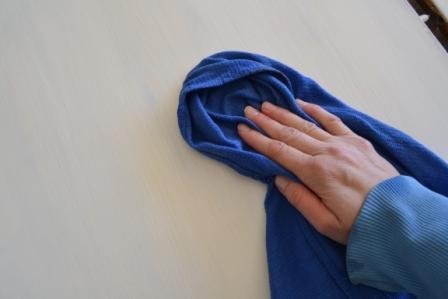
Step 3: Sand down any drips on your primer and make sure your table is covered.
Step 4: Time to paint! Apply a thin coat with your paint brush and allow it to dry (like overnight). Just a note, I am always afraid of curves like on the pedestal, but with a good paintbrush it is honestly easier than a long flat surface like a table top.
Step 5: Sand any bad spots first, then apply your second coat of paint and let it dry (it’s so hard to wait!) I let mine dry for three days.By the way… you can keep your paintbrushes in the fridge overnight wrapped in plastic so you don’t have to clean it all the time:
Step 6: Apply protective layer, allow it to dry. Sand any missteps before continuing. I used the Helsman brand, that also comes in a spray, because a different all-wise-furniture-painting friend swears by it.
Step 7: (This is one that I wish I had skipped!) Apply a second layer if you want to after the first has dried.
Step 8: Enjoy your table FOREVER!
And here is my celebratory treat!
I couldn’t achieve the “no brush strokes” look I was hoping for, but it still looks great. Next time I paint however I am going to buy FLAT paint and achieve a sheen through the protective coat. For a project this size, it could even be a sample size and I could save some big bucks (well, $10). ALSO, I would only do one coat of urethane, unless I was using spray paint and I would do two. Live and learn I guess.
Happy Creating!