i am hardware

just searching for sawdust and sunshine

  • Email
  • Facebook
  • Instagram
  • Pinterest
  • Home
  • Blog
  • Project Gallery
  • 2018 DIY Projects
  • Supporters
  • About

2013/05/24 by: Sarah

IKEA Inspired Euro-sized Envelope Pillow 3-step Tutorial

The brown bear project continues. Hold your right hand up and swear that the next time you’re at the fabric store and the lady tells you “your fabric is a remnant, would you like the rest of the bolt for 75% off” you shout YES! I scored this awesome fabric by happenstance, no plan for it at all, 1.4 yards of heavy upholstery fabric for 8 buckaroos! What!? At home it worked everywhere. I liked the fabric so much that I broke a decorating rule to use a textile in one room only… what a rebel, I know. I copied an old IKEA envelope pillow:

IKEA inspired euro-sized envelope pillow case in just three steps! So easy!

This pillow is fast and easy, like one hour for both! You need: 26″x26″ for the front panel and 26 x 36″ for the back panel (but check your euro pillow first as they vary in size). I used the decorative fabric for the front only because I have another project in mind. Follow this THREE STEP tutorial, you’ll be surprised how easy it is!

1. Hem the bottom of the front and back pieces at the bottom only.
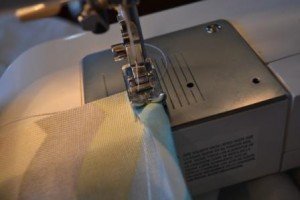
hem the front hem back

2. Put right sides together and then fold the bottom of the back piece until it is even with the bottom. Pin it.

3. Sew around three sides, everything but the bottom. Fold right side out and viola! The envelope portion will hold the bottom of the pillow in the cover. No hand stitching, zippers, or buttons, how can we not love that?
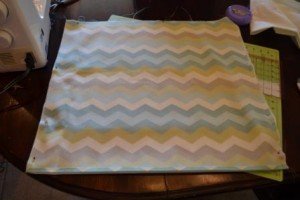
sew around three sides

One more after pic:

DSC_0069

I have so many projects planned for the long weekend… Happy Creating!

You May Also Like...

  • Pillow with Piping TutorialPillow with Piping Tutorial
  • Word Sign Made With Pallet WoodWord Sign Made With Pallet Wood
  • Ugly frame to Magnet Board UpcyclingUgly frame to Magnet Board Upcycling
  • Floor Cushion Seats and the BEST Way to Cut FoamFloor Cushion Seats and the BEST Way to Cut Foam
Parsons Chair Slipcover Tutorial
Pillow with Piping Tutorial

Comments

  1. oakley oil rig sunglasses says

    2013/06/03 at 5:20 am

    Thanks for the great Post very COOL!!!

    Reply
    • Sarah says

      2013/06/03 at 11:33 am

      Thanks for the comment, so glad it was helpful!

      Reply

Trackbacks

  1. Pillow with Piping Tutorial | i am hardware says:
    2013/05/28 at 3:34 pm

    […] […]

    Reply

Leave a Reply Cancel reply

Your email address will not be published. Required fields are marked *

Follow Hardware

  • Email
  • Facebook
  • Instagram
  • Pinterest

Join the DIY-volution

Search for your favorite projects and posts:

Instagram
Join my Instagram Party!

Pindiana Jones - Follow Me!

Be featured!

woodworking plane

Hey Readers! Do you have an awesome REMODEL, a spectacular ETSY shop, a mind-boggling PROJECT, or just a fantastic house you would like to share on … [Read More...]

Recent Posts

  • Kitchen Remodel on a Budget
  • Laundry Room Remodel Progress
  • How To Decorate a Bookshelf
  • Flashback! Ana White Console Table
  • Build Your Own Computer Desk

Project Catagories

Crowd Favorites

Industrial Pendant Lamp — Easy Ikea Hack

industrial light

DIY Ski Storage Racks

How To Fix Toys (or anything) That Have Battery Corrosion

how to clean battery corrosion vinegar and a toothbrush

Overhead Hanging Storage

Parsons Chair Slipcover Tutorial

Parson Chair Slipcover

Featured on these awesome sites:

I was featured on Remodelaholic!
  • Home
  • Project Gallery

© 2020 · Fun Genesis WordPress Theme by, Pretty Darn Cute Design