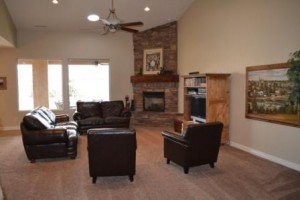
So, you know how Picasso went through his purple phase? Well for the last three years I have been going through a brown (particularly dark brown leather) phase. My whole house is brown, the outside, the inside, the furniture, carpet, stone, art… everything is brown. I need a little color! When we bought the house the entire thing, I’m talking baseboards, doors, ceiling, stucco, stone, walls, was pukey pink. In all fairness the beautiful brown on the walls and the carpet are a huge upgrade and gives me a slate I can work with, but still sometimes I wonder why brown has consumed my life. Still, we have been in this home for 11 months (okay, for 6 of those months I was pregnant, so that’s more like negative six for a total of five) and welcome to America’s brownest living room:
And thanks to an open concept, it is very fittingly joined with the brownest kitchen.
It has bothered me from day one, but one day I woke up and thought, “someone seriously better hide the spray paint, I might go crazy!” After a few deep breathes I decided to take a more rational approach. I honed in on the worst parts and decided to channel the color energy toward greater good. Next week I will start blog on a few projects that breathed a little life to my brown life:
Window coverings
Throw pillows
Brighten the art
Add color to the kitchen table
When my third son was born I vowed to never buy any furniture that wasn’t leather again, well, that really bit me in the pants because now I am literally swimming in dark brown leather! I don’t currently have the luxury of being able to update my furniture, but there are things I can do to add color without spending bucco bucks… Can anyone else relate? Feeling brown/gray/white out there? I would love to hear your ideas for adding color without changing furniture or paint?
Fitting this blog would include my namesake element: Hardware. When I first walked through my house among all the eye sores, the hardware literally killed me. Every room was different, silver, bronze, plastic and even wicker. There were not only two different styles of hardware in the kitchen, but two different finishes. Honestly. I’m all for variety, but hardware should at least match. Although the hodgepodge of hardware was ridiculous, the cost to replace everything was a cool $478 and since I was pregnant and the whole project sounded exhausting… I found another option.
The door knobs and hinges in the home are oil rubbed bronze and although it’s not the rage finish right now, I like the look. If I was going to replace the hardware anyway I thought, for $7 and a couple hours I was going to spray paint them. It worked fabulously. Drum roll…
Clean hardware with soap and water. Remove from cupboards get ready to spray paint according to you paint instructions. Hardware before:
I used Rust-oleum oil-rubbed bronze. LOVE-ed it.
The after is fantastic:
I sprayed 68 pieces of hardware throughout house and it is clean, uniform, and cost $471 less than new stuff! Go me. One suggestion: the spray paint says it is paint and primer, it worked well on the metallic surfaces without primer, but for plastic hardware additional primer is a must, you can’t shortcut it. If you have been considering changing your hardware ask yourself if you like/can live with the style just not the finish. If the answer is yes, don’t walk to the paint store, run!
My sister just bought her first home. Among other requests I will soon blog about she wondered how to fix the chips in her porcelain sink. Okay girls, this is easy peasy and the smallest fixes really brighten up your home and keep it from looking worn-down.
First, clean your sink really well and let it air dry (or use a lint-free cloth.)
Second, use porcelain glaze you can buy from any hardware store. I used “Porc-a-fix Porcelain Touch Up Glaze”, it was about 6 bucks. Match your sink color to the paint color, my sink is white and it matched great. Paint it on like white-out. If the chip is deep and big (dime size or bigger) you will need two coats, for small lines or scratches one coat oughtta do it. Apply and let dry according to your specific glaze instructions.
Chip be gone! Easy project for a glorious after. For some reason it is more fun to do dishes in a pretty sink.
10 hours, 6 people, 5 loads, 4 beds, 3 dirty boys, 2 machines, 1 mom. Dedicated to my mom, Naomi and mothers everywhere. Thank you for all the mountains you have moved for me! Happy Mother’s Day!