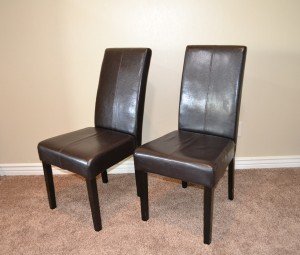
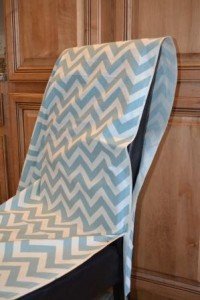
Sometimes when I finish a project I’m doing yahoos all over the town. This is one of those. As part of the brown bear project I desperately needed color in my kitchen. I considered buying some end chairs to liven up the space… but buying means actually spending money and I don’t like to do that. I have six simple parson chairs that I really like around my table and I thought covering two oughtta do it! The total cost was $10, and $10 never looked so good! Before & After:

This project was easy. Like capital E easy. Follow my tutorial below!
Before you start, if you are sewing with patterned fabric decide RIGHT NOW that it’s okay that it doesn’t line up to perfection. Because especially with a chair that has curves, it’s not going to. If you’re committed to not be a crazed line-up-girl, continue (if you can’t handle it buy plain fabric!):
1. Pick a fabric that makes you heart sing. I got this chevron from Amazon.com, I used about 1.5 yards for both chairs, but measure yours out carefully before starting. Use upholstery fabric, or a heavier fabric, anything light weight will tear and you will cry. Well you might not cry, but I would. My fabric wasn’t super heavy, but it does the trick.
2. Decide how long you want the skirt around the bottom. I kept mine short, about 1 inch below the chair seat itself. Drape fabric over the back of the chair. Allow an extra inch or two on the back of the chair below where you want it to end for a hem, be generous, I thought I was leaving tons and it was barely enough. Also allow 2-3 inches where the seat meets the back of the chair to adjust that connection as well. (This is called “blocking”). Make sure the fabric is lining up decently, then cut (allowing for the extra inches in the front and back.)
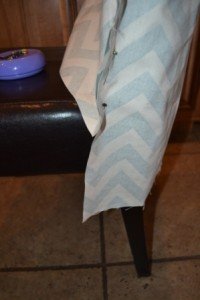
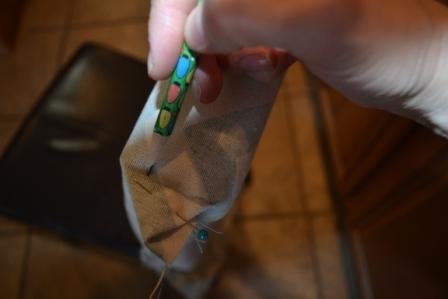
3. With the fabric right sides in, pin the each side of the chair, this will be your first sew line.
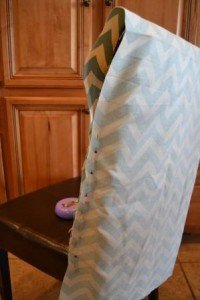
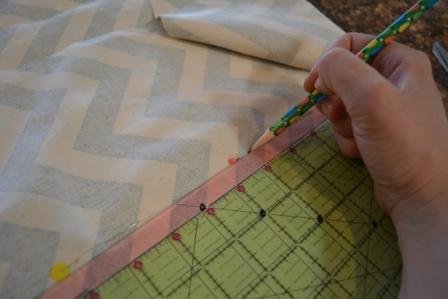
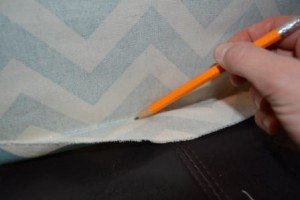
4. On one side use a ruler and a pencil to mark a connection line from pin to pin, kind-of like connect-the-dots. Sew along this line to insure a good fit. (fyi there are fabric pencils you can use, but on the inside out stuff you won’t ever see a pencil works fine)
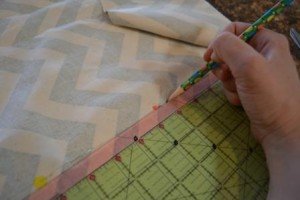
5. Right sides in and one side sewn together, put the fabric back on the chair and adjust pins where needed. Repeat step four (draw a sew line) and sew the second side.
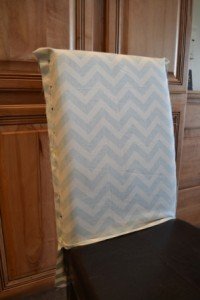
6. At the top of the chair pin the corner down into a triangle and mark a pencil line where the chair ends… for the best fit the line should be more like banana shaped than straight. Sew along the line. You can cut the excess off if it is bulky fabric.
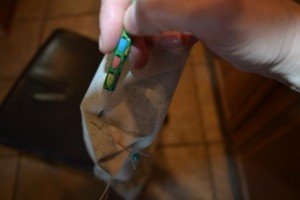
7. Where the back meets the seat part draw a pencil line. Be generous. If you pull too tight the seam will be too high. Pin along this line and then sit in the chair before you sew it… if your bedonk-a-donk is anything like mine you will need to make some adjustments. (the first go around I sewed and unpicked this step TWICE! If you get this part right the rest is a breeze!) Sew. After this step put the cover on right side out and test it out before proceeding, adjust if necessary.
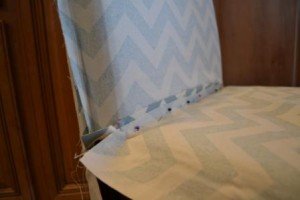
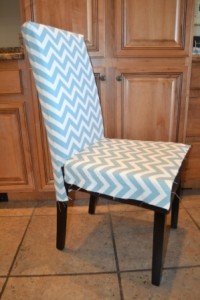
8. More than half done, easy right? Now you are going to apply the skirt. Put the cover inside out and on the chair. Pin the skirt in the front center first at the corner of the chair and then work your way around to the sides. Then pin to the back piece on each side. Be generous on this as well. The cover will hang better if the seam is not on the seat itself but right on the crease or a little lower. Sew.

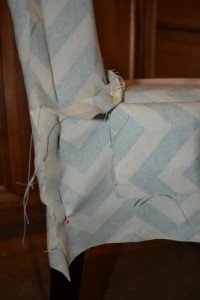
9. Last step! Put your cover on right side out and pin your hem along the bottom. You can measure this out, but I just did it by eye, feeling the bottom of my chair and folding the fabric to meet it. Before sewing the hem iron it for an easy crease.
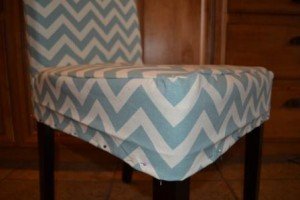
Iron any creases and viola! Ahhhh… finally a little color!
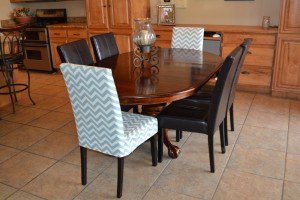
The garage sale stars aligned for me this weekend. I am ecstatic about my hoard sale score on Saturday! I arrived a little early and as I was walking up to the sale it was like tunnel vision to this beauty:
It took me about half a second to know the mirror was destined to be mine. Ohhhhh if I could only be as resolute with all decisions in life as I am at yard sales! This baby is almost four feet in diameter and I have about a bajillion ideas of how to paint it , where to hang it, and what exactly to do with this gem. Stay tuned for a big reveal sometime soon!
Tomorrow I’m back on task with the brown bear project.
Brown bear, brown bear, what do you see? Brown.
So, you know how Picasso went through his purple phase? Well for the last three years I have been going through a brown (particularly dark brown leather) phase. My whole house is brown, the outside, the inside, the furniture, carpet, stone, art… everything is brown. I need a little color! When we bought the house the entire thing, I’m talking baseboards, doors, ceiling, stucco, stone, walls, was pukey pink. In all fairness the beautiful brown on the walls and the carpet are a huge upgrade and gives me a slate I can work with, but still sometimes I wonder why brown has consumed my life. Still, we have been in this home for 11 months (okay, for 6 of those months I was pregnant, so that’s more like negative six for a total of five) and welcome to America’s brownest living room:

And thanks to an open concept, it is very fittingly joined with the brownest kitchen.

It has bothered me from day one, but one day I woke up and thought, “someone seriously better hide the spray paint, I might go crazy!” After a few deep breathes I decided to take a more rational approach. I honed in on the worst parts and decided to channel the color energy toward greater good. Next week I will start blog on a few projects that breathed a little life to my brown life:
- Window coverings
- Throw pillows
- Brighten the art
- Add color to the kitchen table
When my third son was born I vowed to never buy any furniture that wasn’t leather again, well, that really bit me in the pants because now I am literally swimming in dark brown leather! I don’t currently have the luxury of being able to update my furniture, but there are things I can do to add color without spending bucco bucks… Can anyone else relate? Feeling brown/gray/white out there? I would love to hear your ideas for adding color without changing furniture or paint?
Fitting this blog would include my namesake element: Hardware. When I first walked through my house among all the eye sores, the hardware literally killed me. Every room was different, silver, bronze, plastic and even wicker. There were not only two different styles of hardware in the kitchen, but two different finishes. Honestly. I’m all for variety, but hardware should at least match. Although the hodgepodge of hardware was ridiculous, the cost to replace everything was a cool $478 and since I was pregnant and the whole project sounded exhausting… I found another option.
The door knobs and hinges in the home are oil rubbed bronze and although it’s not the rage finish right now, I like the look. If I was going to replace the hardware anyway I thought, for $7 and a couple hours I was going to spray paint them. It worked fabulously. Drum roll…
Clean hardware with soap and water. Remove from cupboards get ready to spray paint according to you paint instructions. Hardware before:
I used Rust-oleum oil-rubbed bronze. LOVE-ed it.
The after is fantastic:
I sprayed 68 pieces of hardware throughout house and it is clean, uniform, and cost $471 less than new stuff! Go me. One suggestion: the spray paint says it is paint and primer, it worked well on the metallic surfaces without primer, but for plastic hardware additional primer is a must, you can’t shortcut it. If you have been considering changing your hardware ask yourself if you like/can live with the style just not the finish. If the answer is yes, don’t walk to the paint store, run!
Happy updating!