Sep
2013
Paint Your Front Door… and totally like it
The curb appeal on my house isn’t the greatest. There are a few things I can update that would make a difference. For some reason I have no reservations about painting or changing the interior of my home, but when it comes to the exterior I am more hesitant, kinda shy, like… well, people will see it. My big sis, and by big I mean older I am way bigger than she is, painted her door and I was drooling just a little too much, so she gave up her whole morning (and this girl is busy!) to help me paint mine. Here is the after:
The door was okay before. Big and wood, which are two things I typically love, but it was just kinda “eh”. After a few strokes I was loving the new look and it was a total party! I owe my sister so big time. Check out the before:
Materials needed:
- Good bristle paint brush (a better one saves you time and heartache on this project)
- Rag to clean
- Painters tape and throw cloth
- Helsman Spar Urethane
- Miniwax Gel Stain (I used Hickory)
Step 1: Clean your door. Like clean it, clean it. I used dish soap, a lint-free rag, and lots of water. Try to let it air dry, or get a lint free clean cloth to dry it. Make sure it is completely dry.
Step 2: Tape off the edges and lay down a drop cloth
Step 3: Paint the first coat. This was my first time using a gel stain. I used it in part because I still wanted to see the grain of the wood but didn’t want to sand the whole thing down. I have sanding aversions sometimes. They’re not kidding when they say “gel”, it’s more like pudding stain. It seems goopey at first, but goes on smoothly. We started with all the beveled edges and went from section to section. Don’t worry that some of the paint is thicker in some areas, you will take care of that on the second coat. Remember to paint around the side of the door where the hinges are, because you can see that side every time you open the thing. Oh, and don’t judge us by our super hot painting clothes:


Step 4: After the first coat is completely dry (check the can for specific times), apply the second coat and let it totally dry. The wait-to-dry part is a little unnerving when it’s your front door, because I felt like I had to be home alllll day, but it will be worth it I promise.
Step 5: (I closed my door for this part) Apply a protective urethane coating. I have always used urethane in a can and applied with a paint brush because it’s cheaper. The spray is a lot faster though and I tried the spray because my sis brought the supplies and I am a total moocher.  This stuff goes on like spray paint, so if you are a good spray painter you’ll love it. If you are a spray paint newbie it might be best to leave experimentation for a different project, just my opinion. Case in point, I got a little overzealous and ended up with this disaster:
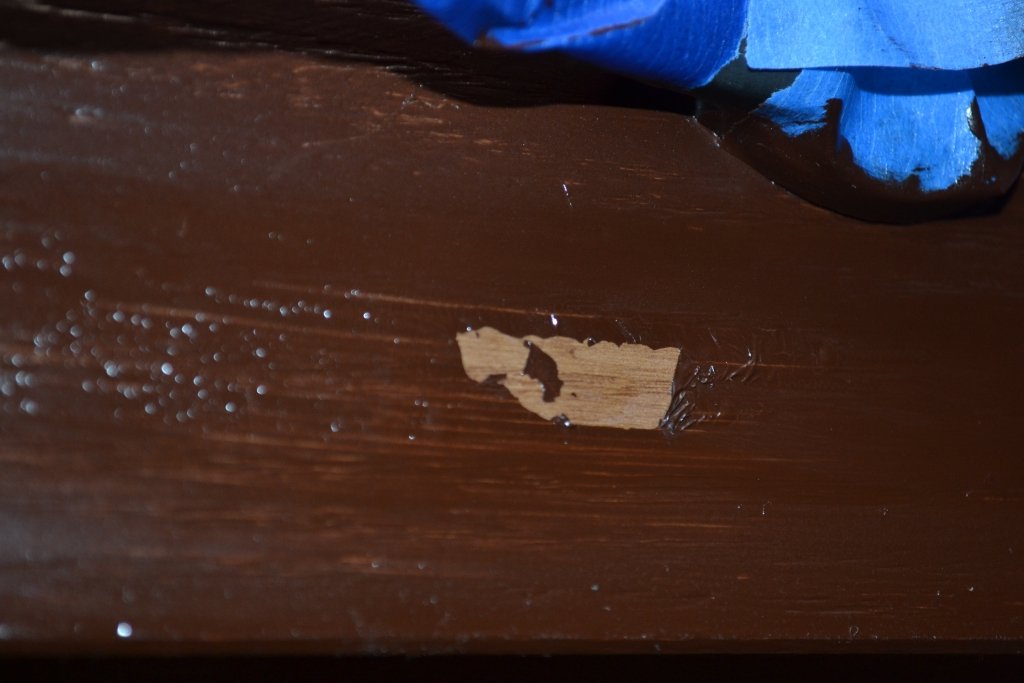
and I had to sand off certain portions and start over. Booo. Paint bubbles for different reasons but two common culprits are when the coat underneath isn’t dry or the temperature is too cold. Don’t try to go too fast like I did, this is one area where it will not behoove you at all.
Step 6: You might need two coats of spray to give the door an even, protective sheen. Allow the urethane to dry completely and DONE!
This project really spruced up the exterior of my house and every time I see it I love it, thanks sis!
Andrea
2013/09/04 at 7:27 pm (4 years ago)Love the new door color! Are you brave enough to post a picture of the whole house so we can see the complete effect?
Sarah
2013/09/05 at 11:14 am (4 years ago)thanks andrea! i will take a picture… currently i have ripped off my plastic shutters and haven’t replaced it, so it’s kinda sketchy!